| Table of Contents |
|---|
How to create and configure a validated custom field
Go to the custom fields management screen (
/secure/admin/ViewCustomFields.jspa).Click “Create custom field”.
Go to the “Advanced” tab, and select one of the validated custom fields.
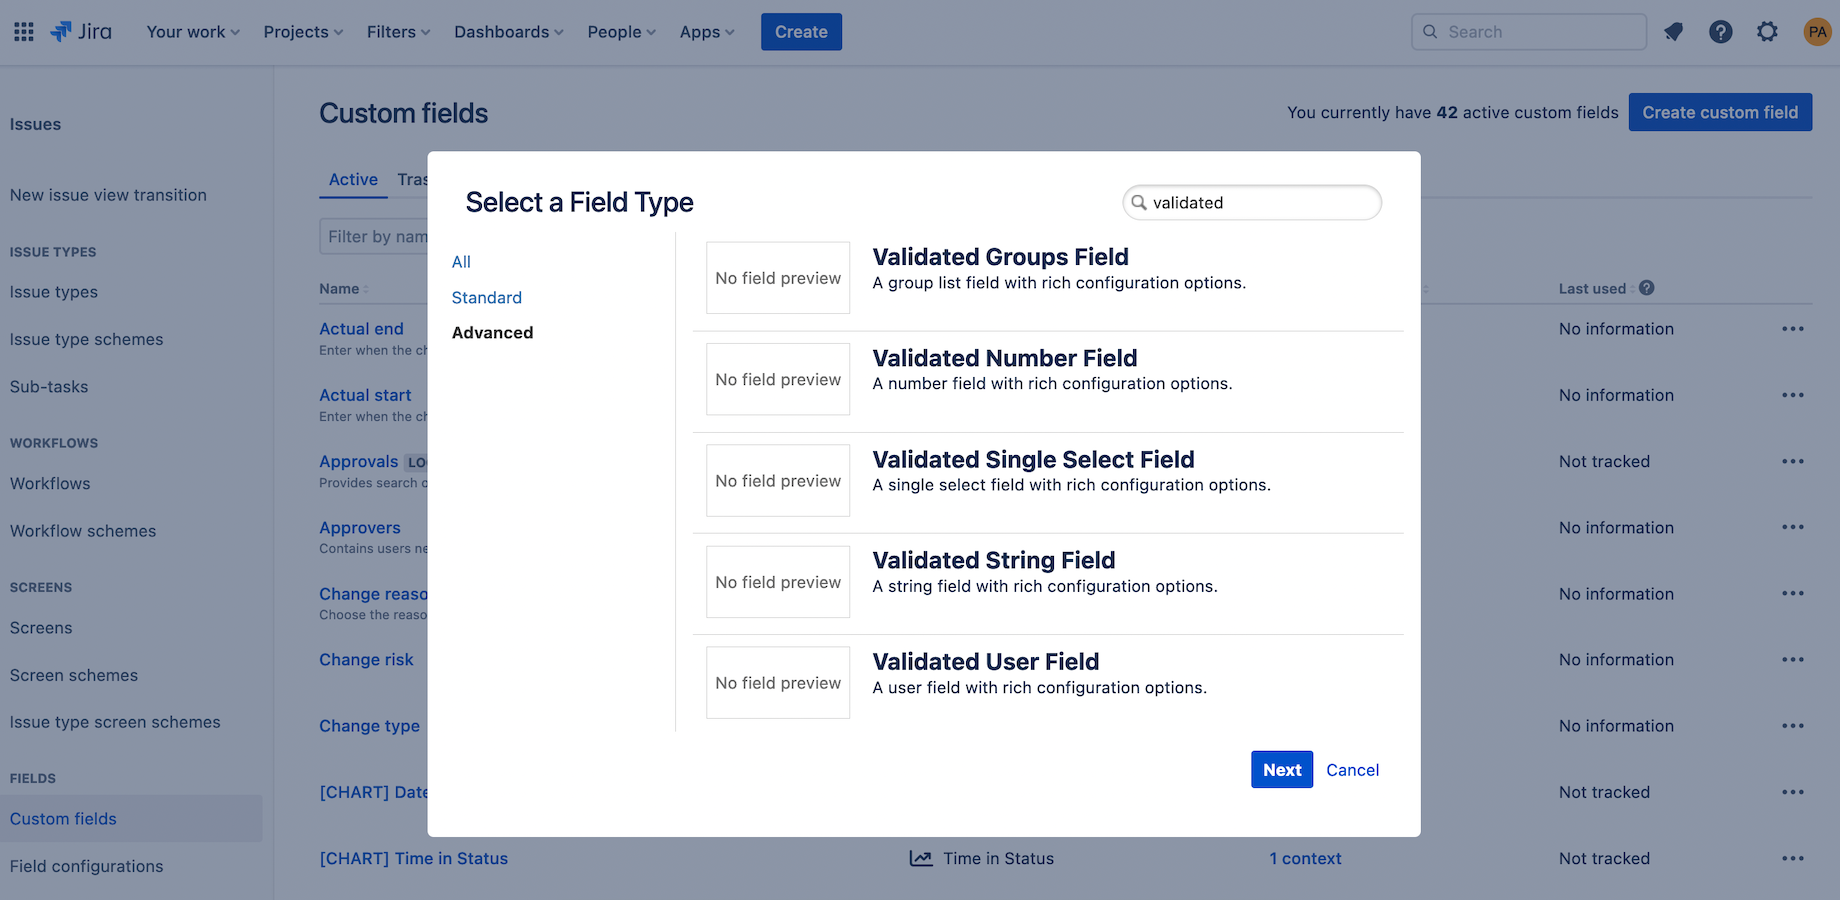
Enter the field name and description.
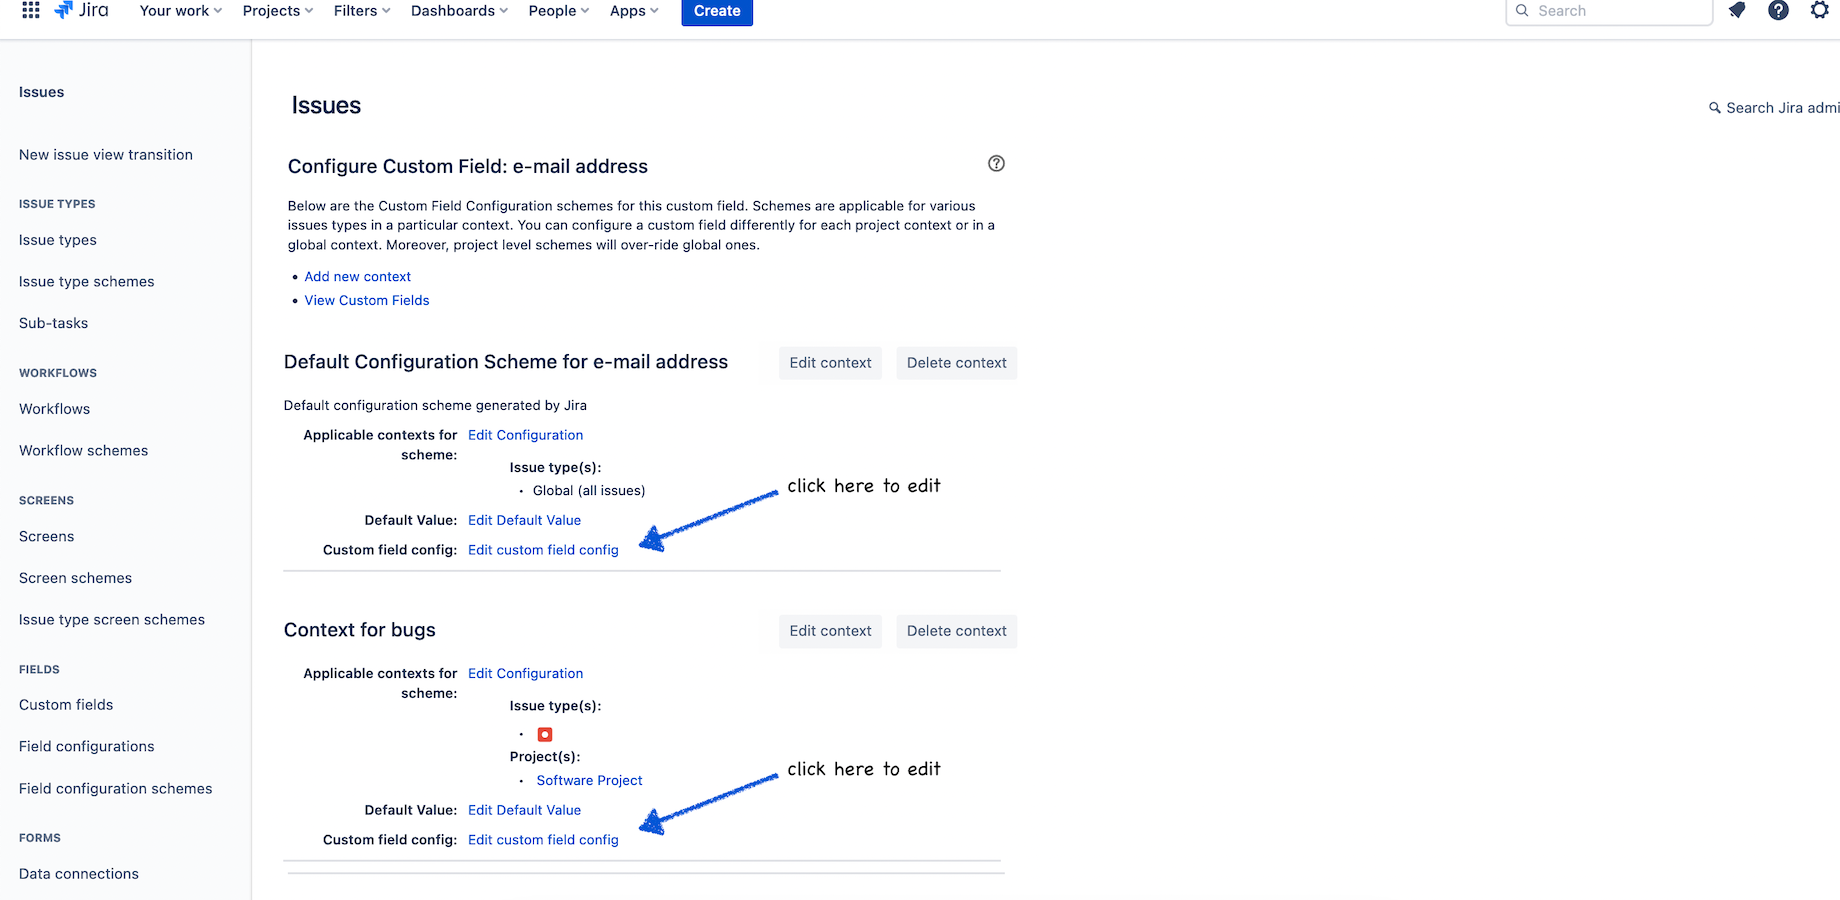
Find the newly created field on the list, click the three dots “…”, and select “Contexts and default value”.
To configure the field in a selected context, click “Edit custom field config”.
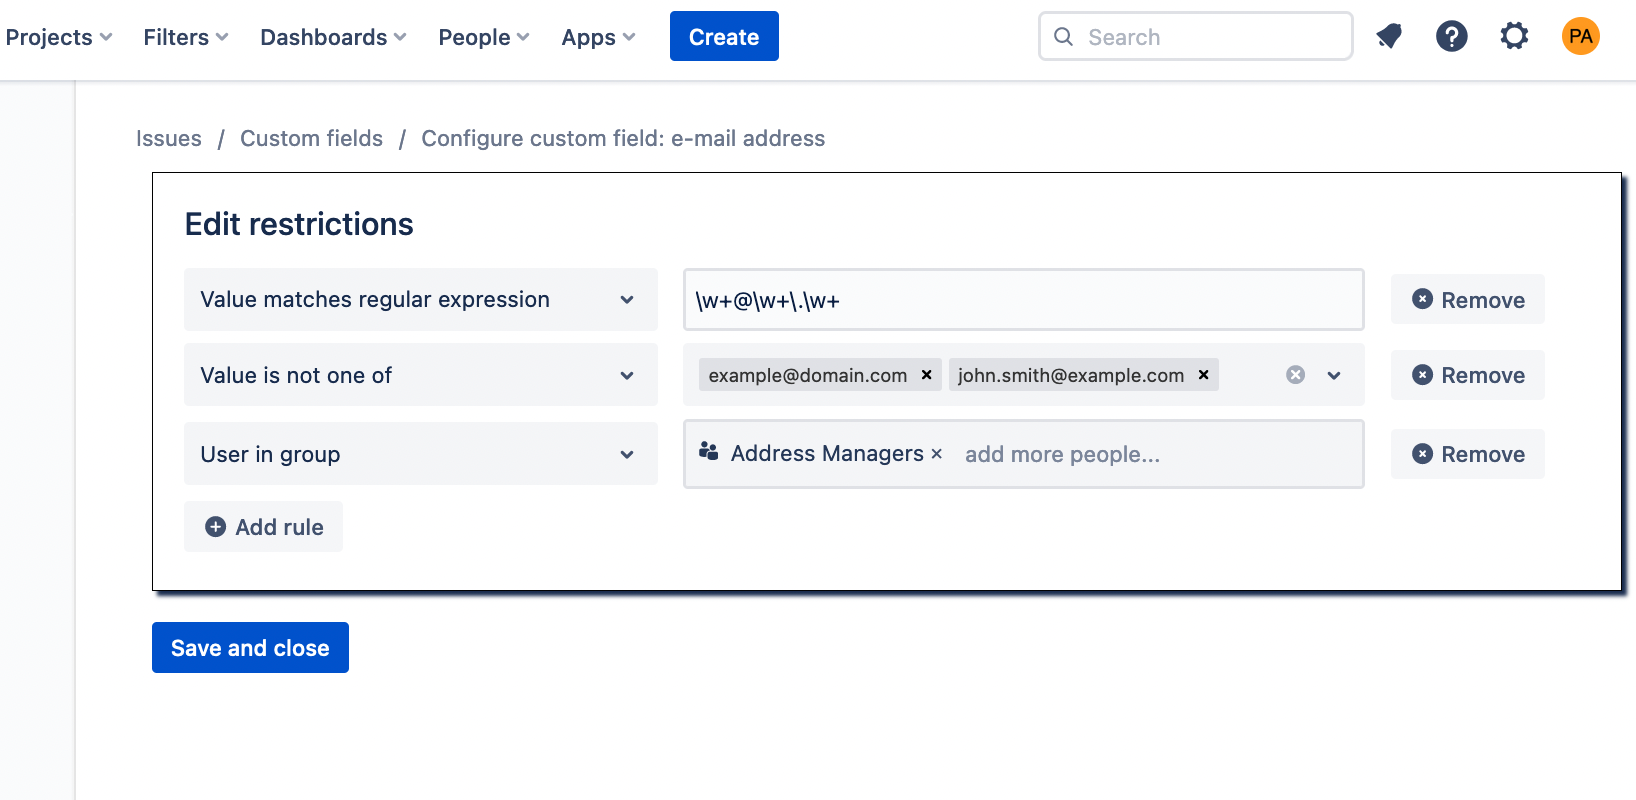
Select the rules you want to apply when the field is edited and click “Save and close”.
Validated custom field types
...
The field stores a list of groups. Offers group auto-complete during edit and when searching in JQL.
...
Combining validation rules
Multiple rules can be defined for a field. They are all joined with the logical AND operator, meaning that all must pass for the value to pass validation.
The significance of AND
Some rules allow any argument to be true to pass. For example, the User in group rule allows you to select multiple groups, and will pass if the user belongs to any of the selected groups. But in may happen that you need to ensure that the user must belong to all groups from a given set. Such rules can be selected multiple times for one field, and since all rules are joined with AND, they will all have to pass for the whole validation to pass, allowing you to combine OR (within one rule) and AND (across rules) to match your needs.
Validation rule types
Below is a list of all validation rules available in the app.
Note that not all rules are available for all custom field types. For example, rules that control the number of items on the list are available only for multi-value fields.
...
On the configuration page, the text will turn red if the regular expression is invalid.
...
![]() Leaving this empty means that no-one will be allowed to edit the field.
Leaving this empty means that no-one will be allowed to edit the field.
![]() If you want to ensure that the user belongs to more than one group simultaneously, add this rule one time for each required group.
If you want to ensure that the user belongs to more than one group simultaneously, add this rule one time for each required group.
User not in group
Checks that the user who edits the field doesn’t belong to any of the given groups.
User in role
Checks that the user plays any of the issue roles from the selected set:
Creator – user who created the issue.
Reporter – user who reported the issue (this is usually the same as Creator, but can be modified to point to anyone, whereas Creator is an immutable system field).
Assignee – user who is assigned to work on the issue.
Commenter – any user who commented on the issue.
![]() Note that it’s enough for the user to have any chosen role for the rule to pass. For example, selecting Reporter and Assignee in the rule means that both issue reporters and assignees can modify the field. If you want only reporters who are also assignees to modify the field, add two separate rules like this:
Note that it’s enough for the user to have any chosen role for the rule to pass. For example, selecting Reporter and Assignee in the rule means that both issue reporters and assignees can modify the field. If you want only reporters who are also assignees to modify the field, add two separate rules like this:
...
Thanks to this you can freely chose all possible combinations of roles joined by all logical operators.
User mentioned in a comment by
Checks that the user was mentioned in a comment written by any of the provided users. This can be useful for implementing “sign-off” kind of workflows.
![]() If you want more than one user to have to write a comment, add this rule one time for each required user.
If you want more than one user to have to write a comment, add this rule one time for each required user.